Managing Users
When a Redis™ deployment is successfully deployed, you need to create users so that you can start working with your Redis™. This article will help walk you through the detailed process.
1. Locate your target deployment
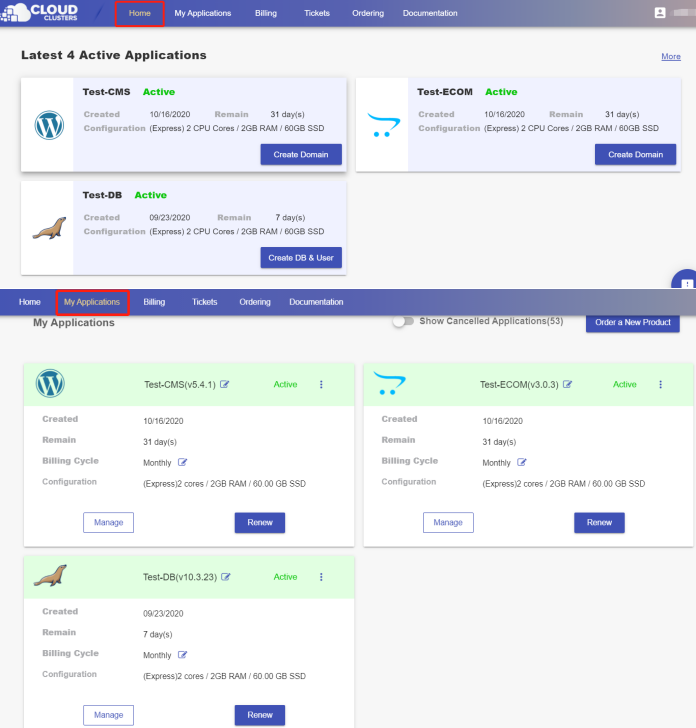
Log in to the Control Panel and locate your target deployment on the Home page or the My Applications page.
2.Go to the “DB & Users” page
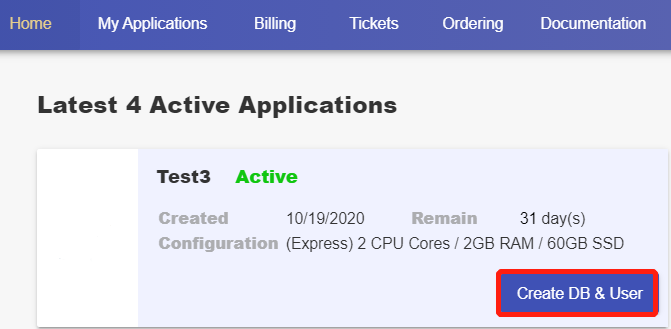
Go to the DB & User page by clicking the "Create DB & User" button on the Home page.
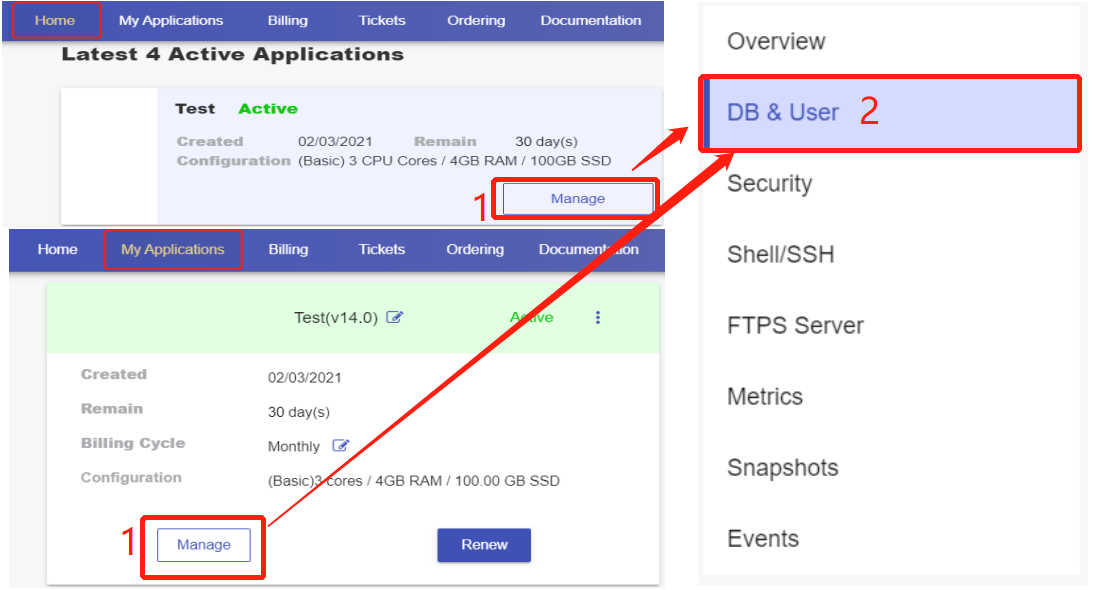
If the button does not show, you can go to the DB & User page by clicking the "Manage" button on the Home page or the My Applications page.
3. Manage Databases
You don't create a database in Redis™ with a command, the number of databases is defined in the configuration file with the databases directive. A Redis™ instance supports 16 logical databases. They are numbered from 0 to 15. By default, you connect to database 0 when you connect to your Redis™ instance. You can change the database you’re using with the select command after you connect. To connect to your Redis™ instance, please refer to this documentation.
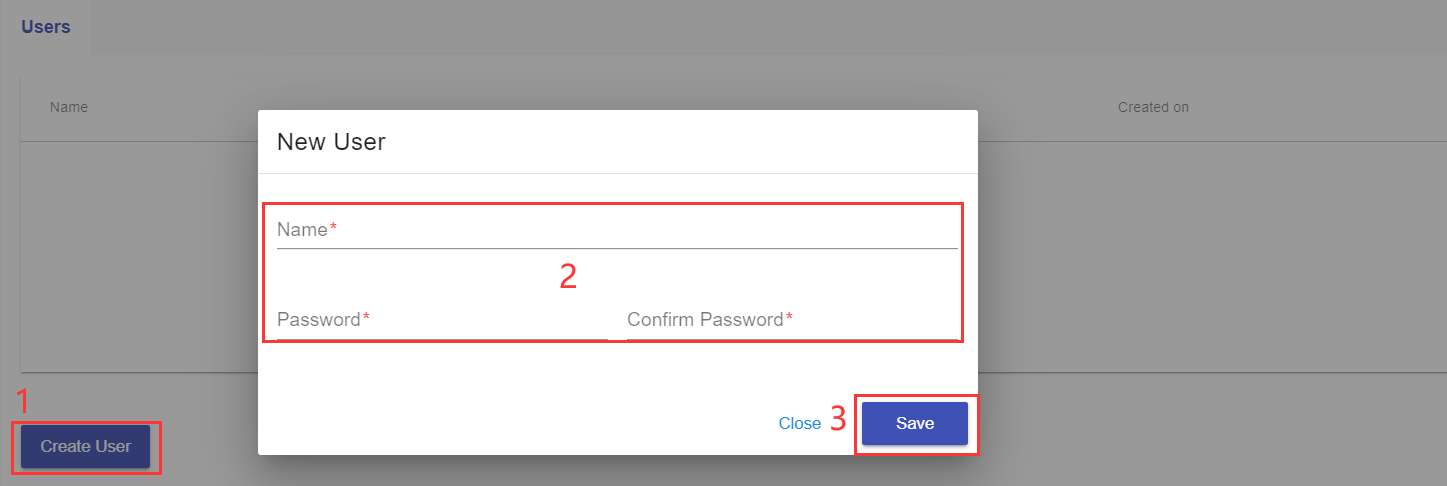
4. Create a user
Click on “CREATE USER” and fill in the information required in the pop-up box. The user will be created right away.