Deploying an ASP.NET Core 5.0 Application
In this article we will show you how to deploy your asp.net core 5.0 application to our cloud platform. Currently ASP.NET Core 5.0 runtime environment is available for ASP.NET Core 5.0 application. If the version of your ASP.NET Core application is lower than 5.0, you may need to migrate your ASP.NET application from current version to 5.0 first.
Precondition:
Shell/SSH has been enabled in the Control Panel;
An FTP client like FileZilla client has been installed on your local PC;
There should be an asp.net core 5.0 project on your side.
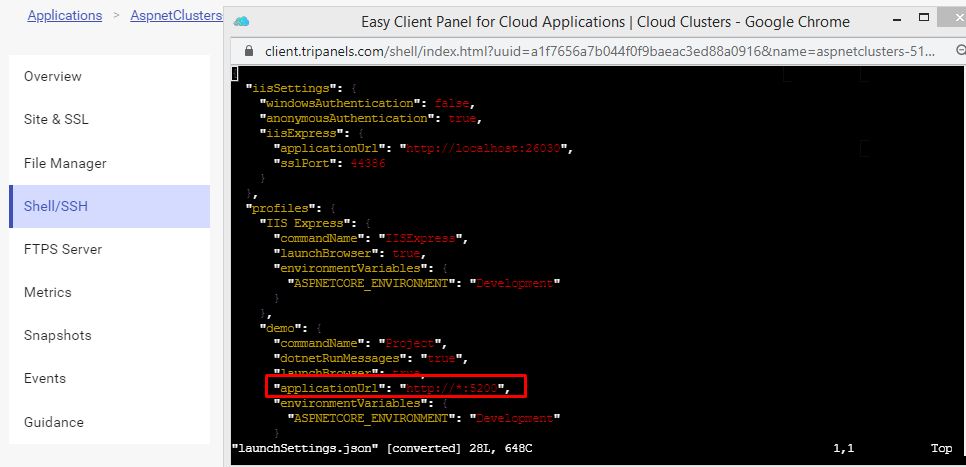
The application Url must be set to "http://*:5200"
1. Transfer your ASP.NET Core project files to Cloud Clusters platform
Please refer to Transferring Data via FTPS to upload your ASP.NET core project to Cloud Clusters platform.
Remove the default ASP.NET Core demo project files before uploading.
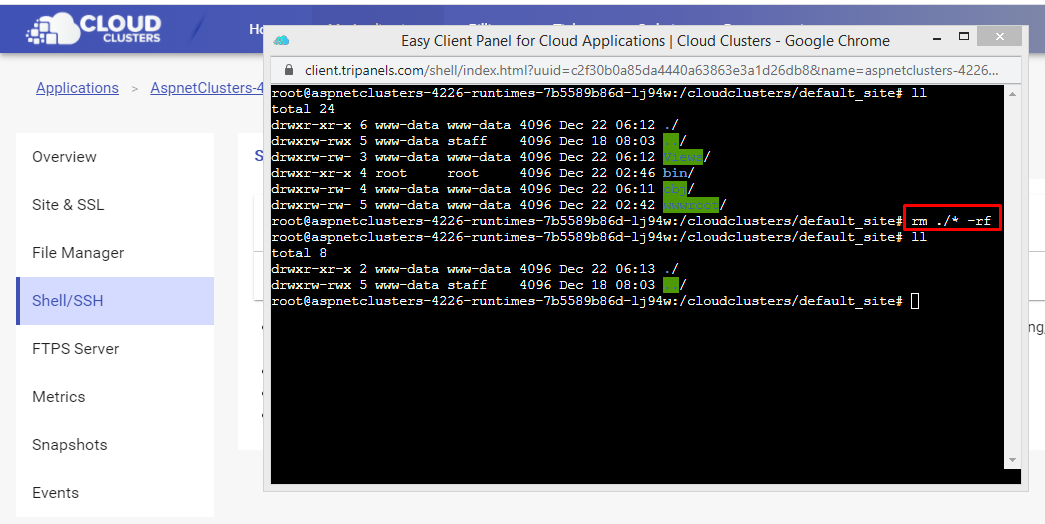
In this case, we have already deployed an asp.net core demo project under /cloudclusters/default_site. Before you upload your own asp.net core project files into cloud. Please delete all files under the default_site directory via Shell/SSH.
Open Shell/SSH then run "rm ./* -rf" under /cloudclusters/default_site directory to remove files.
cd /cloudclusters/default_siterm ./* -rf
Transfer your asp.net core project files into default_site folder.
After deleting the asp.net core demo project files. Then start to transfer files via FTP. At the left side of FileZilla client, enter into your asp.net core project home directory.
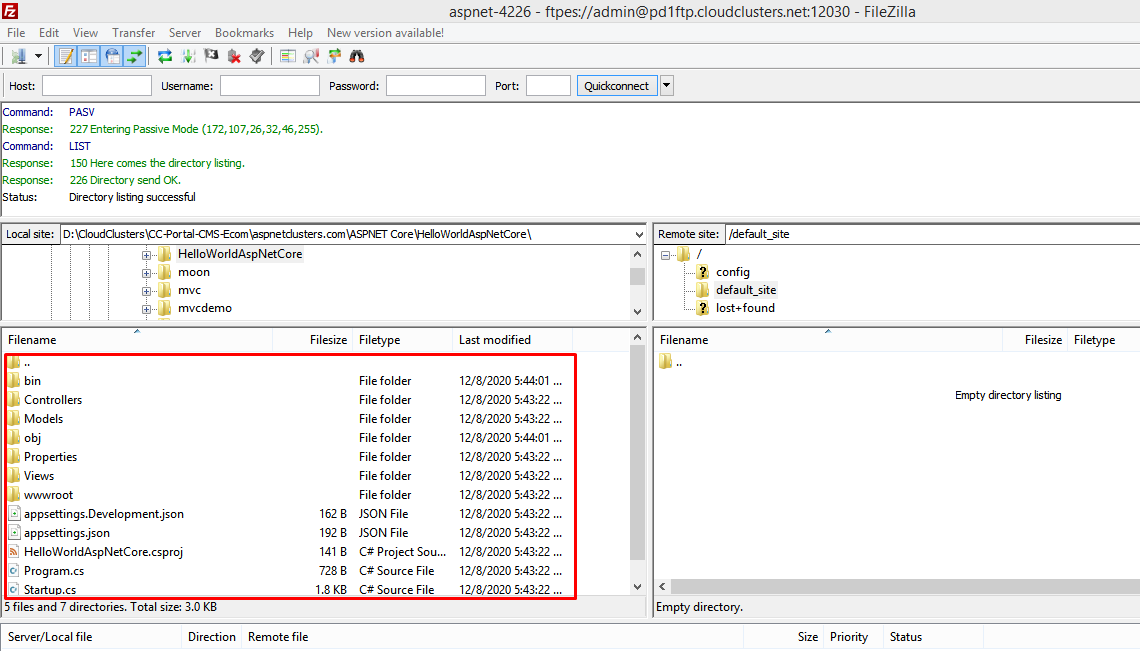
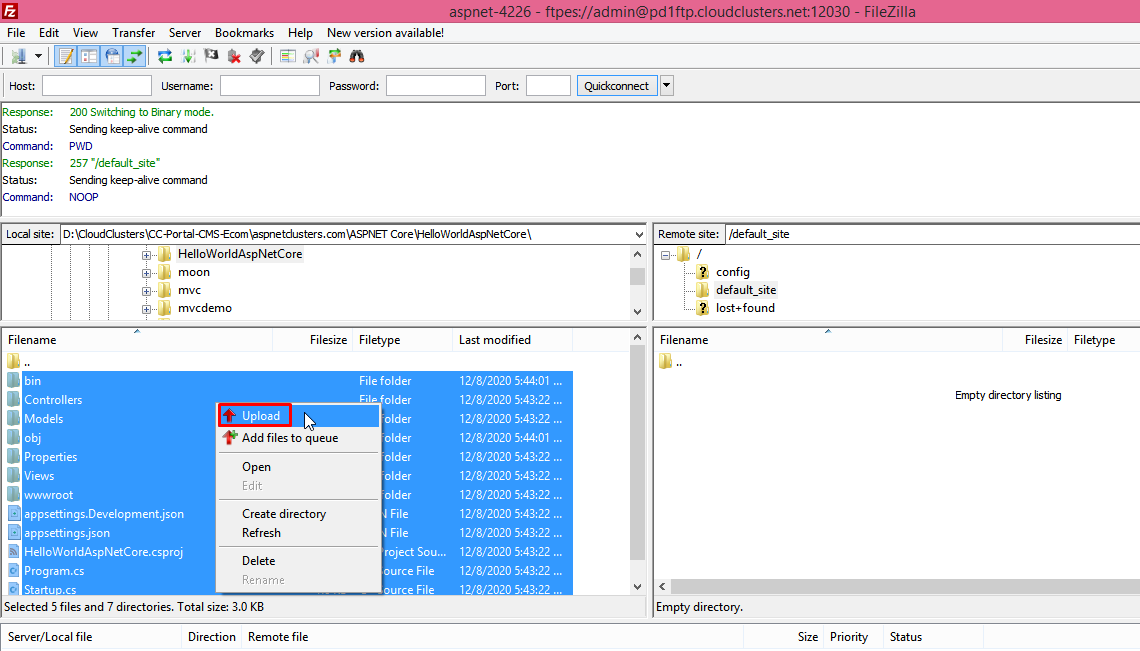
Select all files then click "Upload".
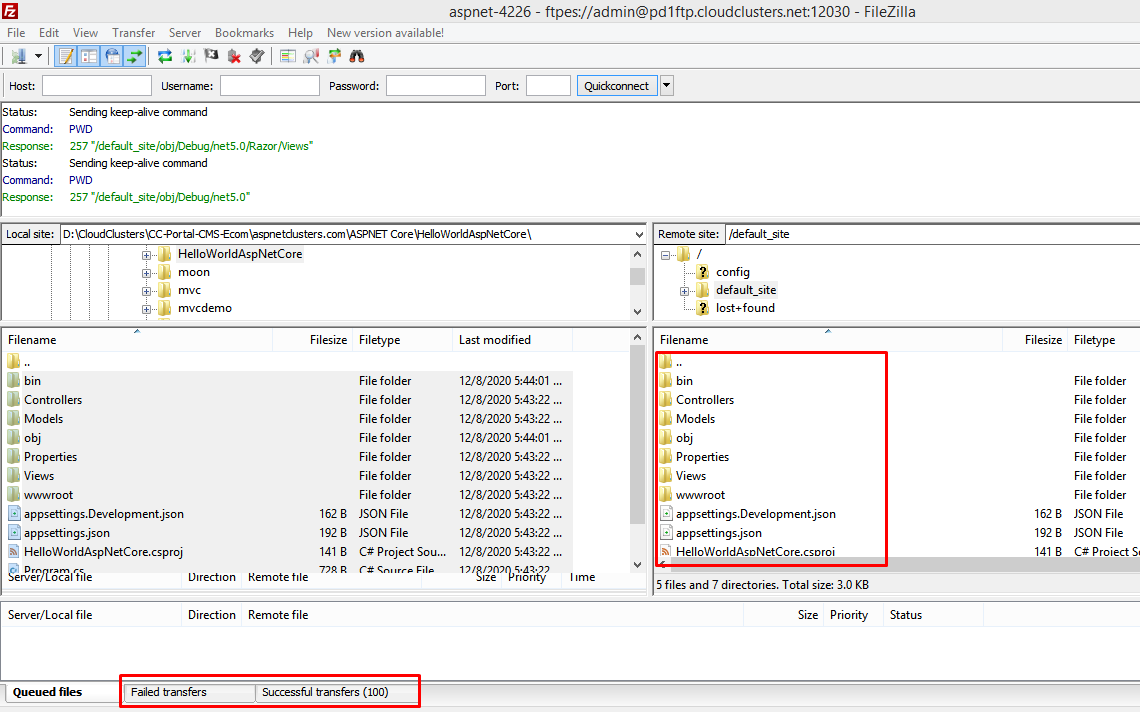
Transfer again if some of your files failed to upload till all of your asp.net core project files have been transferred into default_site folder.
2. Change applicationUrl to http://*:5200
Change applicationUrl to http://*:5200 in Program.cs
Open Shell/SSH and modify Program.cs. Execute command below then add webBuilder.UseUrls("http://*:5200"); under webBuilder.UseStartup
(); cd /cloudclusters/default_sitevim Program.cs
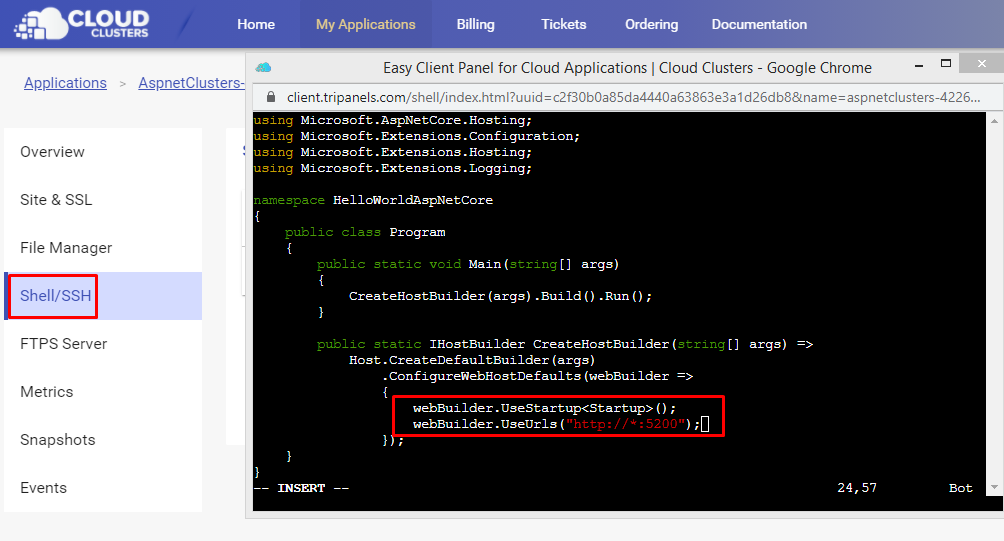
Note: Do not use https://*:5200
Change applicationUrl to http://*:5200 in Properties/launchSettings.json
Open Shell/SSH, execute command below:
cd /cloudclusters/default_site/Propertiesvim launchSettings.json
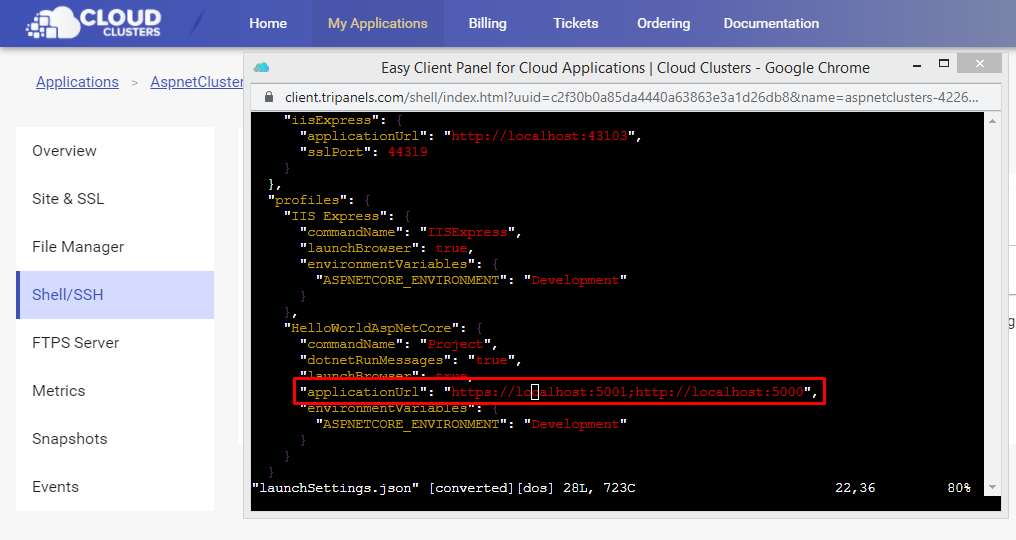
Change applicationUrl to http://*:5200
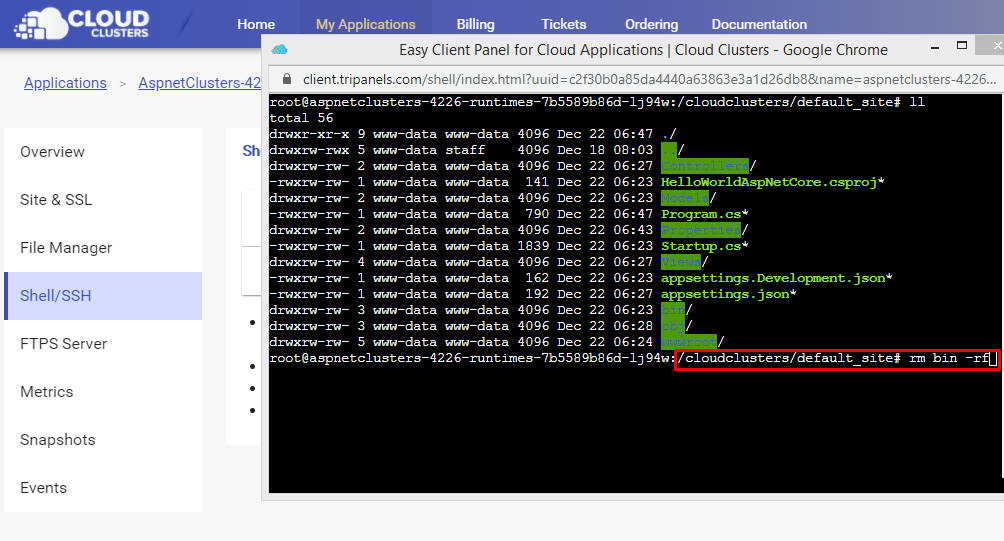
3. Publish your asp.net core project again
Remove the bin folder if you have already published your asp.net core project by executing the commands below:
cd /cloudclusters/default_site/rm bin -rf
Publish your asp.net core project again to generate .dll file by executing the commands below:
cd /cloudclusters/default_site/dotnet publish -c release

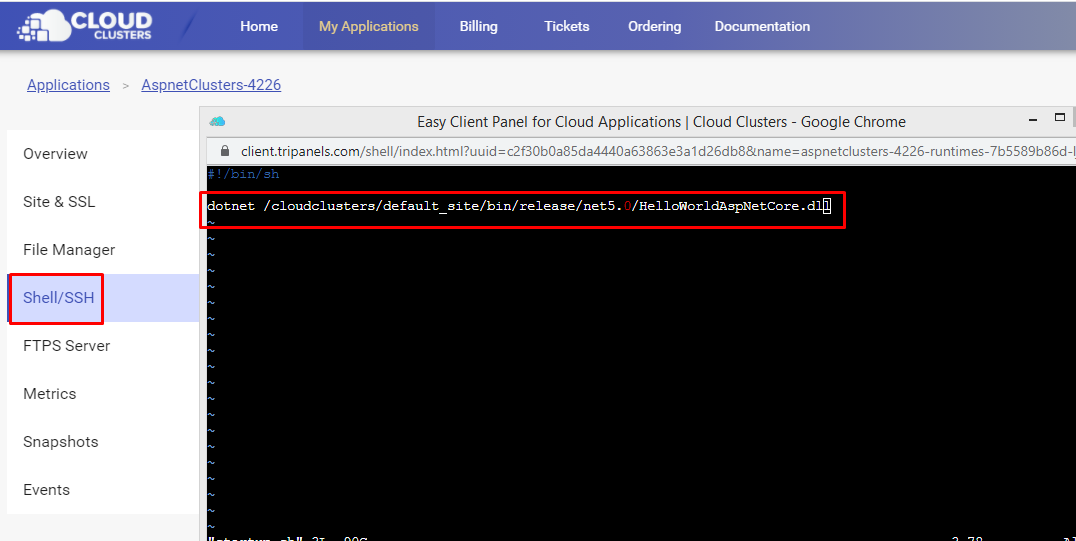
Modify startup command in /cloudclusters/config/aspnet/startup.sh
Go to the /cloudclusters/config/aspnet/ in Shell/SSH, and modify startup.sh
Change the startup command to "dotnet /cloudclusters/default_site/bin/release/net5.0/HelloWorldAspNetCore.dll"
cd /cloudclusters/config/aspnetvim startup.sh
4. Start the asp.net core application
Execute the command in Shell: supervisorctl restart aspnet
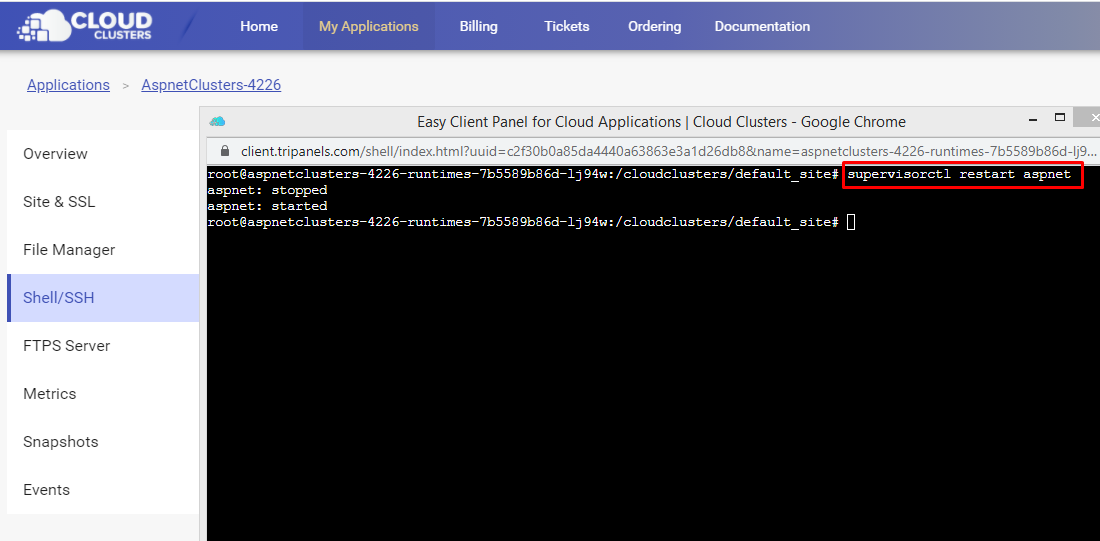
If the restart fails, please try restarting the application from the Control Panel.
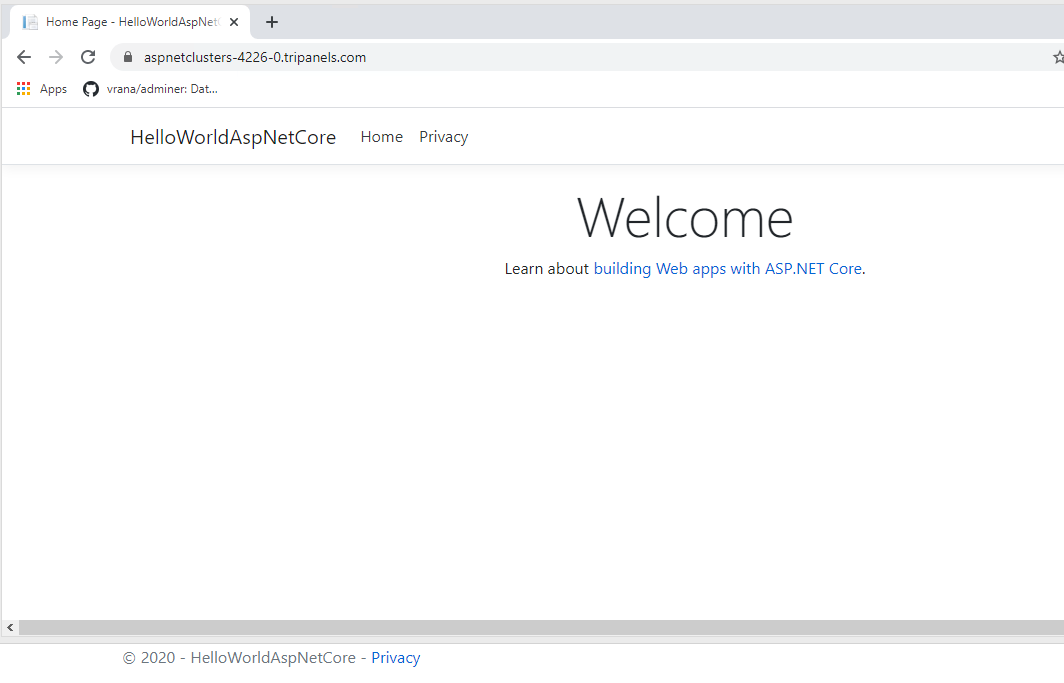
5. View your asp.net core application in browser
Find the default domain name on the Site & SSL page.
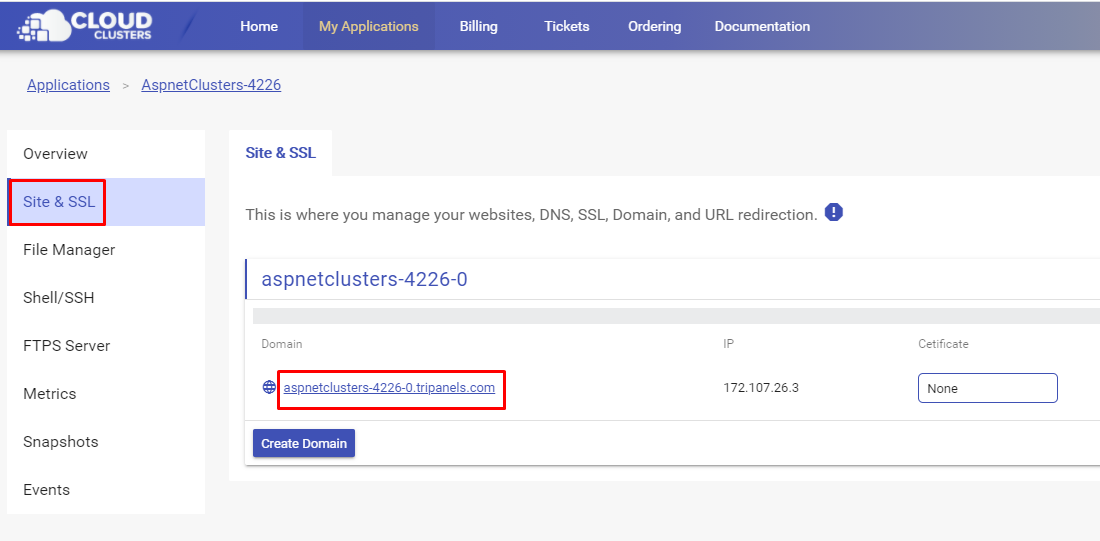
Check if your asp.net core application works in browser.
Submit a ticket if you have difficulty in running your asp.net core application.