What is the WordPress .htaccess File and How Can I Make Changes to It?
1. What is .htaccess file?
The. htaccess file is a configuration file for websites running on Apache Web Server. It is used to perform a variety of function for websites, including performing redirection, specifying 404 page, defining home page, and restricting access, etc. For instance, if you are revamping your website and you want to restrict access to a page, you can do it by using .htaccess file without modifying your website.
2. Where is the .htaccess file located?
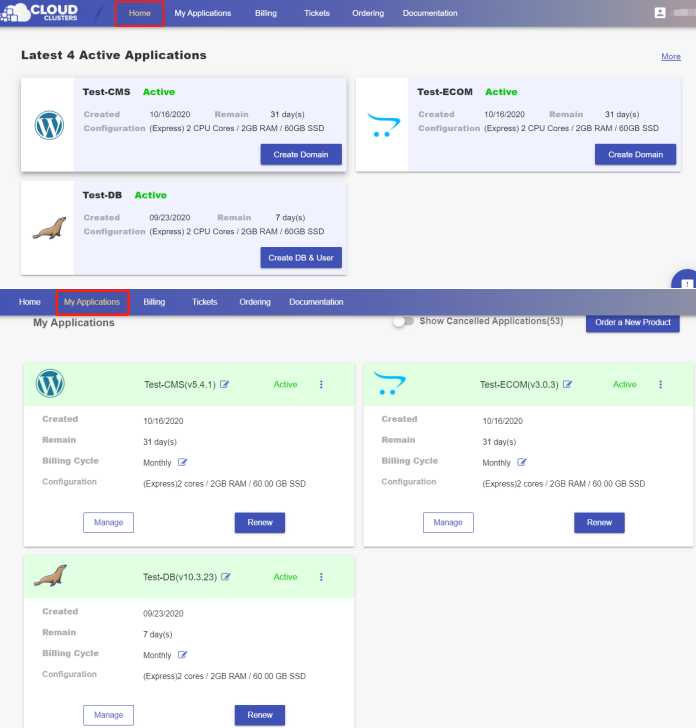
Log in to the Control Panel and Locate your target deployment on the Home page or the My Applications page.
Go to the File Manager page by clicking the "Manage" button on the Home page or the My Applications page.
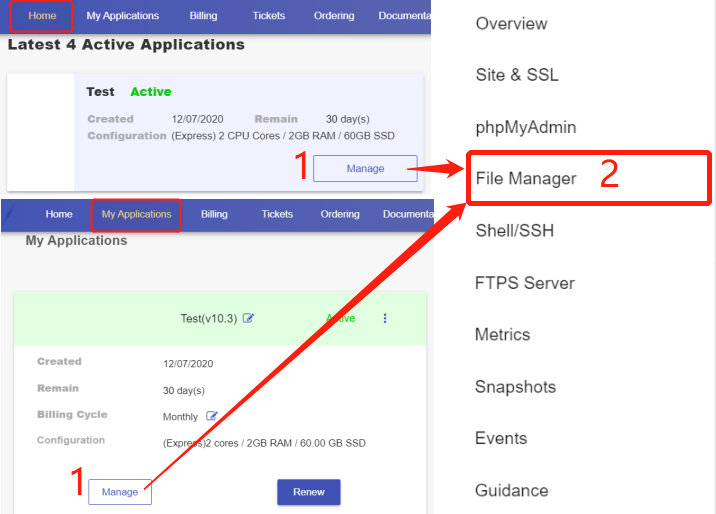
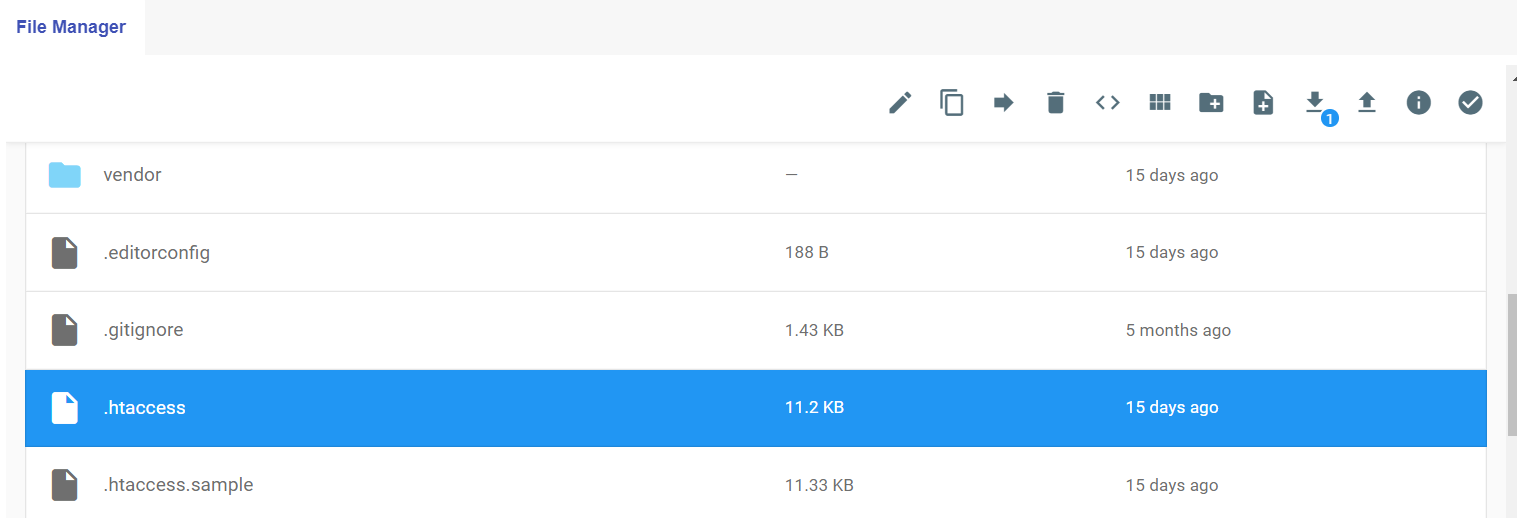
The .htaccess file is located in the “File Manager”.
3. Edit the .htaccess File
Windows: Using Notepad and saving the file as “.htaccess”
Mac OS X: Using TextEdit and saving the file as ".htaccess"
4. Make changes to .htaccess File
When you are editing the .htaccess file, it’s important to back it up first since mistakes in .htaccess file will cause your site to crash.
The most common instructions you will find in a WordPress .htaccess file are redirecting and rewriting of URLs. WordPress has a set of instructions on the .htaccess file that control how WordPress sites behave. The basic .htaccess in WordPress contains the following contents:
1. Basic WordPress .htaccess
#BEGIN WordPressRewriteEngine On
RewriteBase /
RewriteRule ^index.php$ – [L]
RewriteCond %{REQUEST_FILENAME} !-f
RewriteCond %{REQUEST_FILENAME} !-d
RewriteRule . /index.php [L]
#END WordPress
2. Writing .htaccess Comments
When you look at .htaccess file you are likely to see lines that are preceded by a hash sign. These lines are referred to as comments and, as stated above, they help you understand the code.
3. How to Ban IPs and Bots from Your WordPress site
One of the best ways to stop spam comments from bots is to block the IPs where the spams are from. It is also useful for blocking access for people who try hacking your site. You can edit .htaccess file and block users based on their IP by adding the following code to your .htaccess blocks users by IP:
#Banning WordPress site access by IP
<Limit GET POST>
order allow,deny
deny from xxx.xxx.xx.x
deny from xxx.xxx.xx.x
deny from xxx.xxx.xx.x
deny from xxx.xxx.xx.x
allow from all
</Limit>
You should replace the XXXX with the respective IP addresses that you want to ban.
4. How to Limit WordPress File Uploads Size
Limiting the file upload size is a very important measure for membership sites. Members should only upload files with proper size so that the overall the loading speed of your site will not be slowed. You can edit .htaccess to limit the upload file size by the following code in your .htaccess: (Website master should limit the size of to-be-uploaded files so that the overall the loading speed of your site will not be slowed. You can edit .htaccess to limit the upload file size by the following code in your .htaccess:
# Limit file uploads to 20MB LimitRequestBody 20240000
This limits the upload file size to 20 MB
5. How to limit WordPress login by IP Address
Securing your WordPress site from hackers is the most important for your business. One way of adding a security layer in your WordPress site is to prevent other people from logging into your site by authorizing IP access to your sites. This is an effective way to ensure that only you and whitelisted people can log in to your site.
# Limit WordPress login admin by IP
# This goes in the /admin folder NOT root folder .htaccess
AuthUserFile /dev/null
AuthGroupFile /dev/null
AuthName “WordPress Admin Access Control”
AuthType Basic
<Limit GET POST PUT>
order deny,allow
deny from all
allow from xx.xx.xx.xx //( your static IP)
allow from xx.xx.xx.xx //( Whitelist IP)
allow from xx.xx.xx.xx //( Whitelist IP)
allow from xx.xx.xx.xx //( Whitelist IP)
allow from xx.xx.xx.xx //( Whitelist IP)
allow from xx.xx.xx.xx //( Whitelist IP)
</Limit>
You should replace the XXX.XXX with the whitelisted IPs. All other IPs will be blocked from accessing your WordPress login and thereby safeguarding your site from hackers.
6. How to Redirect Visitors to Maintenance Page in WordPress
If you are maintaining sections of your site, you can quickly redirect visitors to your maintenance page by editing the .htaccess file. Using the following code in your .htaccess to create a redirect to your maintenance.html page.
RewriteEngine on
RewriteCond %{REQUEST_URI} !/maintenance.html$
RewriteCond %{REMOTE_ADDR} !^123.123.123.123
RewriteRule $ /maintenance.html [R=302,L]
7. How to Stop WordPress Directory Browsing
Apache Web server has file browsing functionality, you need to protect your WordPress installation files by stopping people from directory browsing. The reason why you need to do it is that you may leak your images and other content in your WordPress uploads folder if someone can browser the folder. Therefore, it is necessary for us stop the directory browsing using the following code in your .htaccess:
Options –Indexes
8. How to Stop Access to WordPress Admin
Allowing access to your WordPress admin can make your site vulnerable. You need to stop access to WordPress admin by editing .htaccess file or creating a htpasswds file in your root WordPress installation. In most cases, you should place them in your wp-admin folder. Please do not edit your Root .htaccess file and it must be /wp-admin/.htaccess. It can create an additional layer of security to specify the following instructions in the .htaccess to restrict access to the WordPress admin area.
AuthName “Joe Admin Only allowed to login”
AuthUserFile C:xampphtdocs.htpasswd
AuthGroupFile /dev/null
AuthType basic
require user Njengah
<Files admin-ajax.php>
Order allow,deny
Allow from all
Satisfy any
</Files>
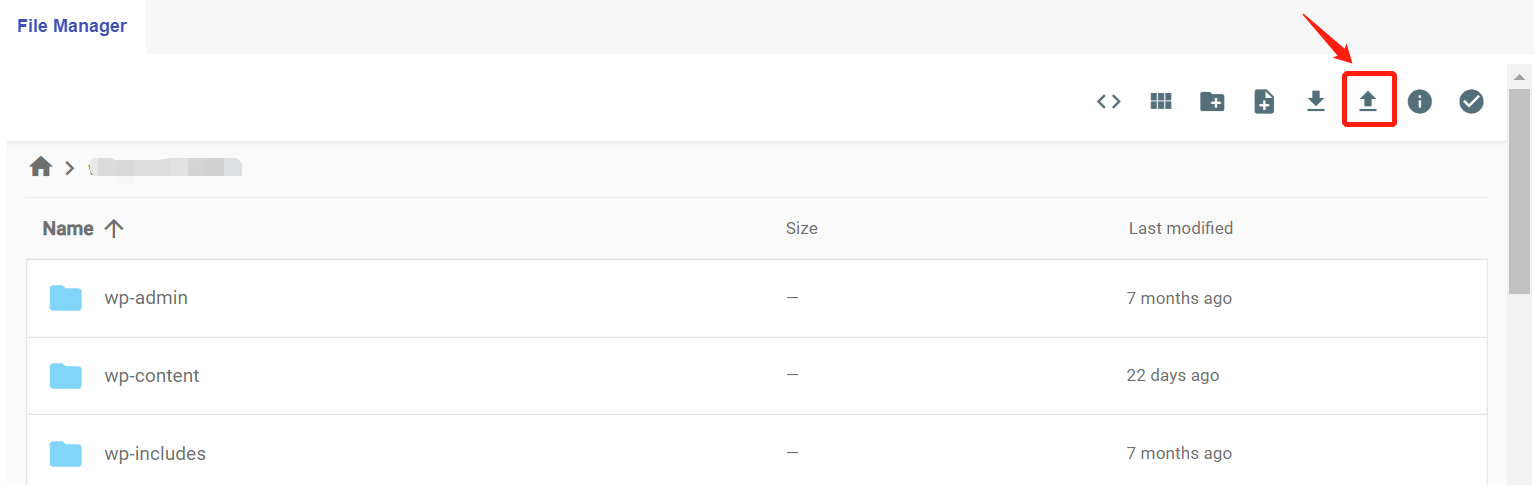
5. Upload a .htaccess File
Log in to the Control Panel and Locate your target deployment on the Home page or the My Applications page.
Go to the File Manager page by clicking the "Manage" button on the Home page or the My Applications page.
Go to the WordPress folder and click the upload icon (see the red arrow) to upload your local .htacess file.