
How to Connect to a Linux Desktop Server (Ubuntu Desktop)
Introduction
This guide explains how to connect to a Linux Desktop server step-by-step. It is written for beginners and covers all available connection methods.
You can connect to your server in two ways:
- Remote Desktop (RDP) — Access the graphical Ubuntu desktop
- SSH — Access the server terminal/command line
This guide also explains:
- How to connect from Windows
- How to connect from macOS
- The difference between Shared IP SSH and Dedicated IP SSH
By the end of this guide, you will be able to successfully connect to your Linux desktop server and start using it immediately.
Order Your Ubuntu Desktop Server
Before connecting, you need to deploy your server.
Step 1: Choose Operating System
On the order page:
- Select Ubuntu 22 Desktop

- Enter your Server Name and Password, then choose any additional resources you may need. Finally, select the preferred billing cycle for your server before proceeding to checkout.
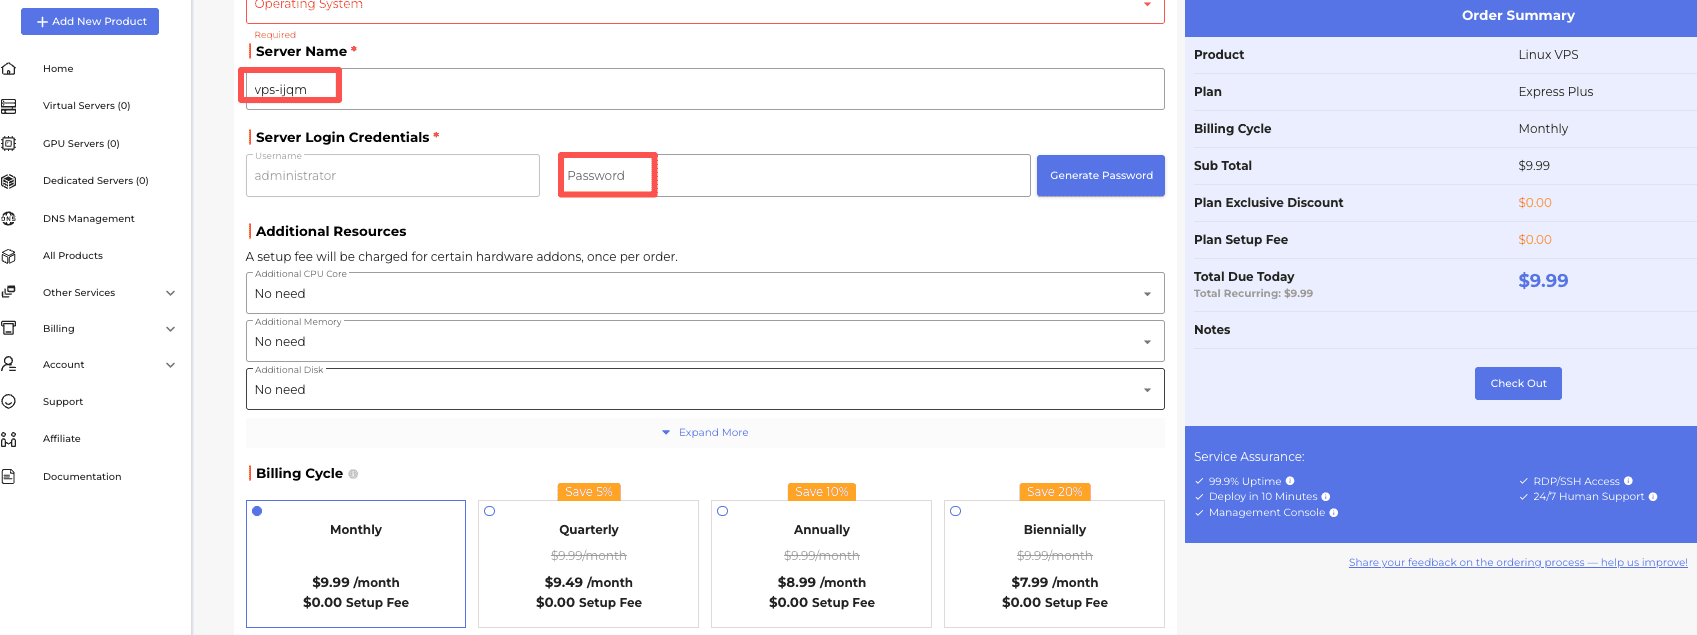
- Click Checkout
- Complete payment
After payment, your Linux Desktop server will automatically start provisioning.
Step 2: Wait for Deployment
After payment, log in to your control panel and locate your server. You can monitor the deployment progress and current server status in real time. Please wait until the server status changes to Active before attempting to connect.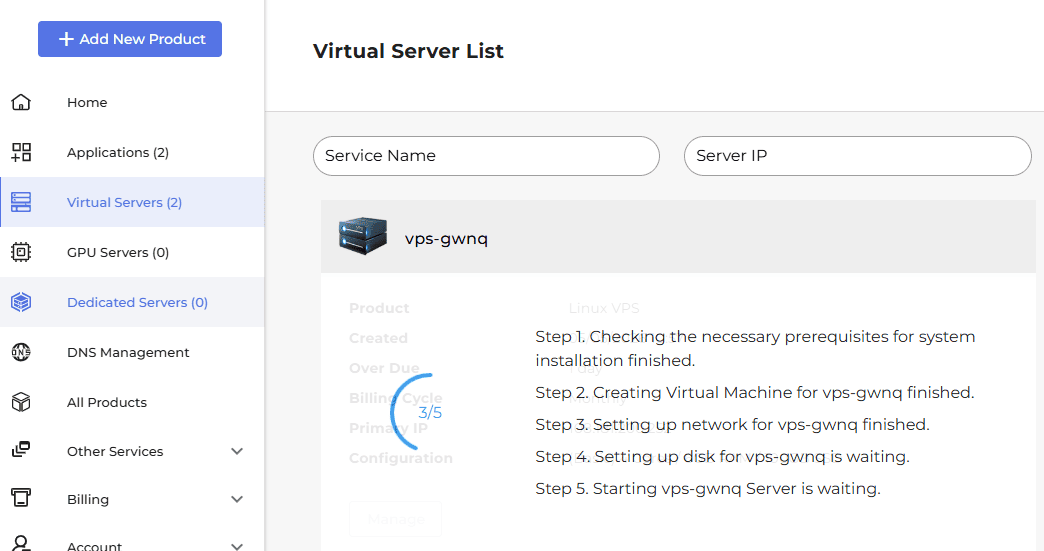
Get Your Server Connection Information
Once deployment is complete:
- Locate your server and click Manage on your server
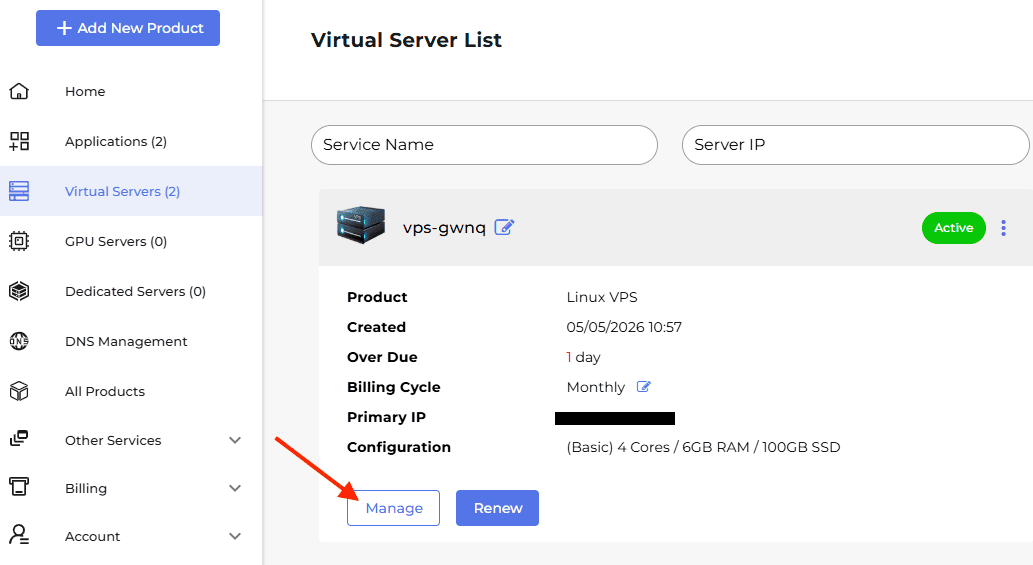
- You will see your server's IP Address, RDP Port, Username, Password, etc.
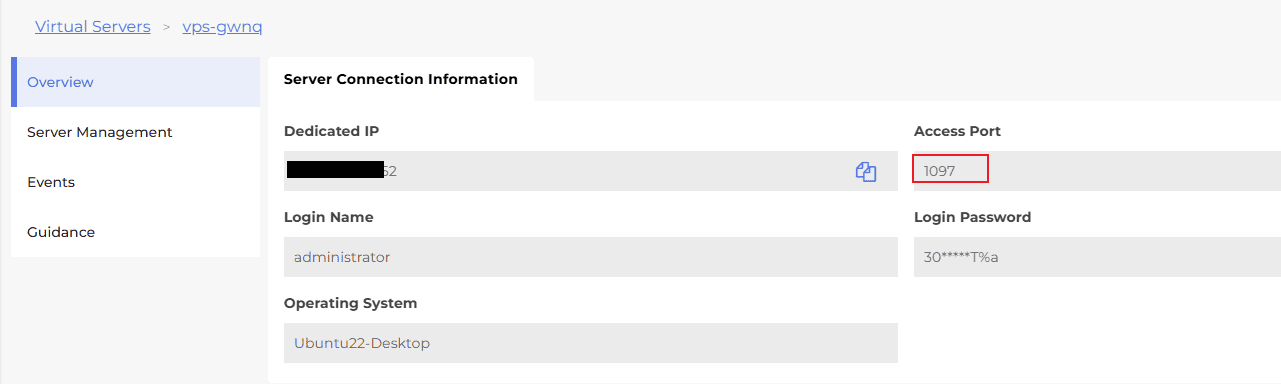
You will use this information for both RDP and SSH access.
Connect via Remote Desktop (RDP)
Remote Desktop allows you to access the Ubuntu graphical desktop interface. There are different connection methods for Windows and macOS users.
Connect to Linux Desktop Server via RDP on Windows
Step 1: Open Remote Desktop Connection
On your Windows computer:
- Press:
Win + S - Search:
Remote Desktop Connection - Open the application
Step 2: Enter Server Address
In the Computer field, enter: IP:PORT
Example:203.0.113.10:1097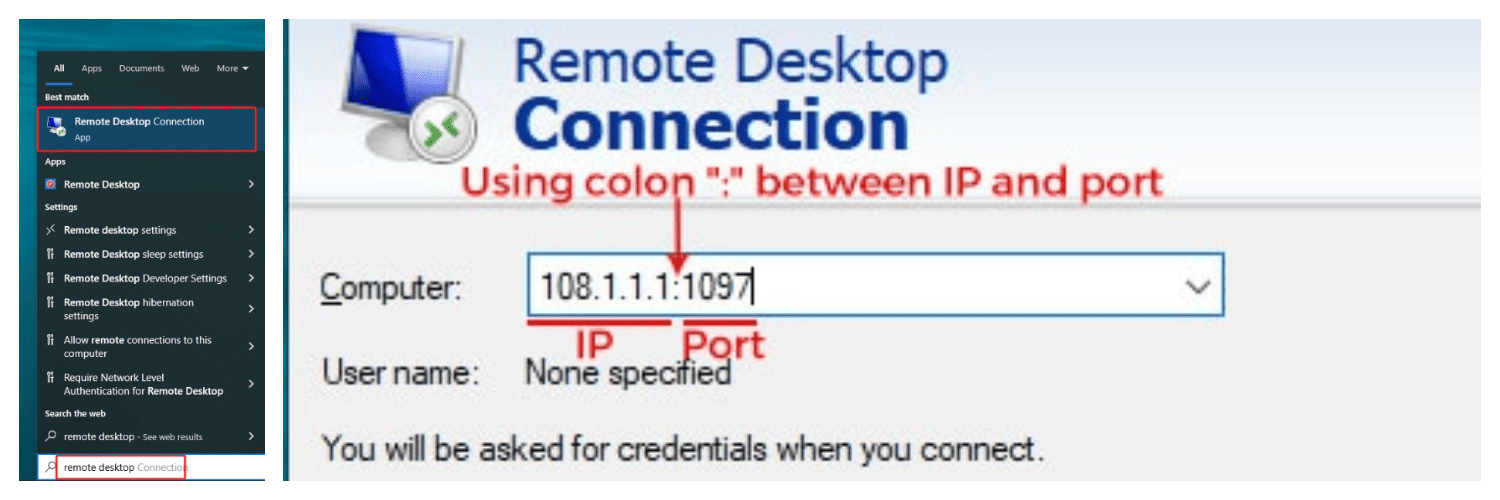
Then click Connect
Step 3: Accept Security Prompt
You may see this warning: The identity of the remote computer cannot be verified. This is normal for first-time connections. Click Yes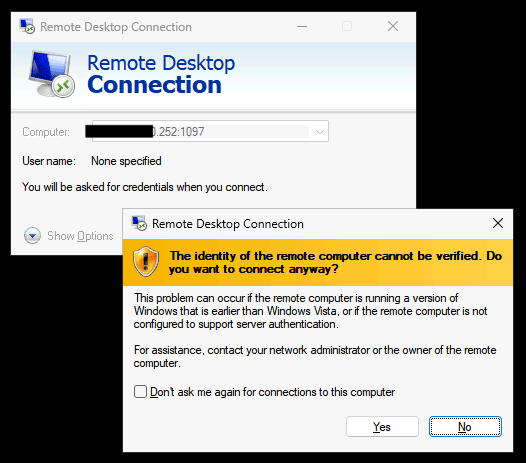
Step 4: Enter Login Credentials
A login window will appear. Enter Username and Password. Then click OK
⚠️ IMPORTANT :
If the username field is automatically filled in as HOSTNAME\administrator, remove HOSTNAME\ and keep only administrator.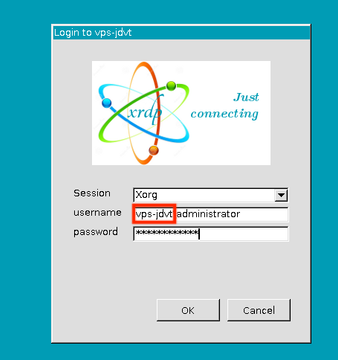
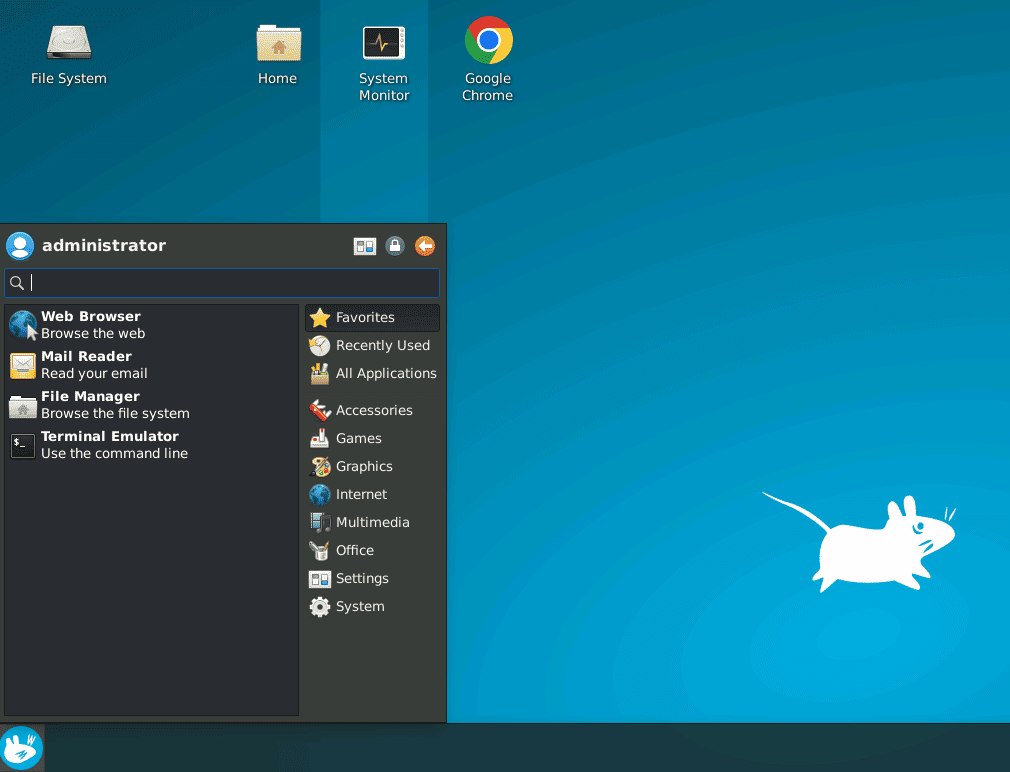
Step 5: Connected Successfully
- You will see the Ubuntu desktop interface
- Your Linux GUI server connection is complete
- You can now use the server like a regular desktop computer
Connect to Linux Desktop Server via RDP on macOS
macOS does not include Microsoft RDP by default, so you need to install it first.
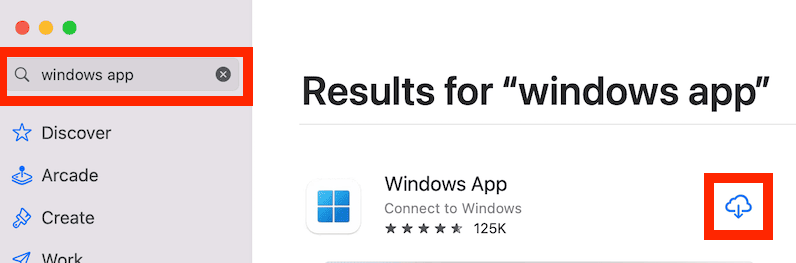
Step 1: Install Windows APP
- Open the App Store
- Search:
Windows APP - Install the application
Step 2: Add a New Connection
- Open Microsoft Remote Desktop
- Click
Add PC
Step 3: Enter Server Information
In the PC Name field, enter: IP:PORT
Example: 203.0.113.10:1097
Click Add to save the connection.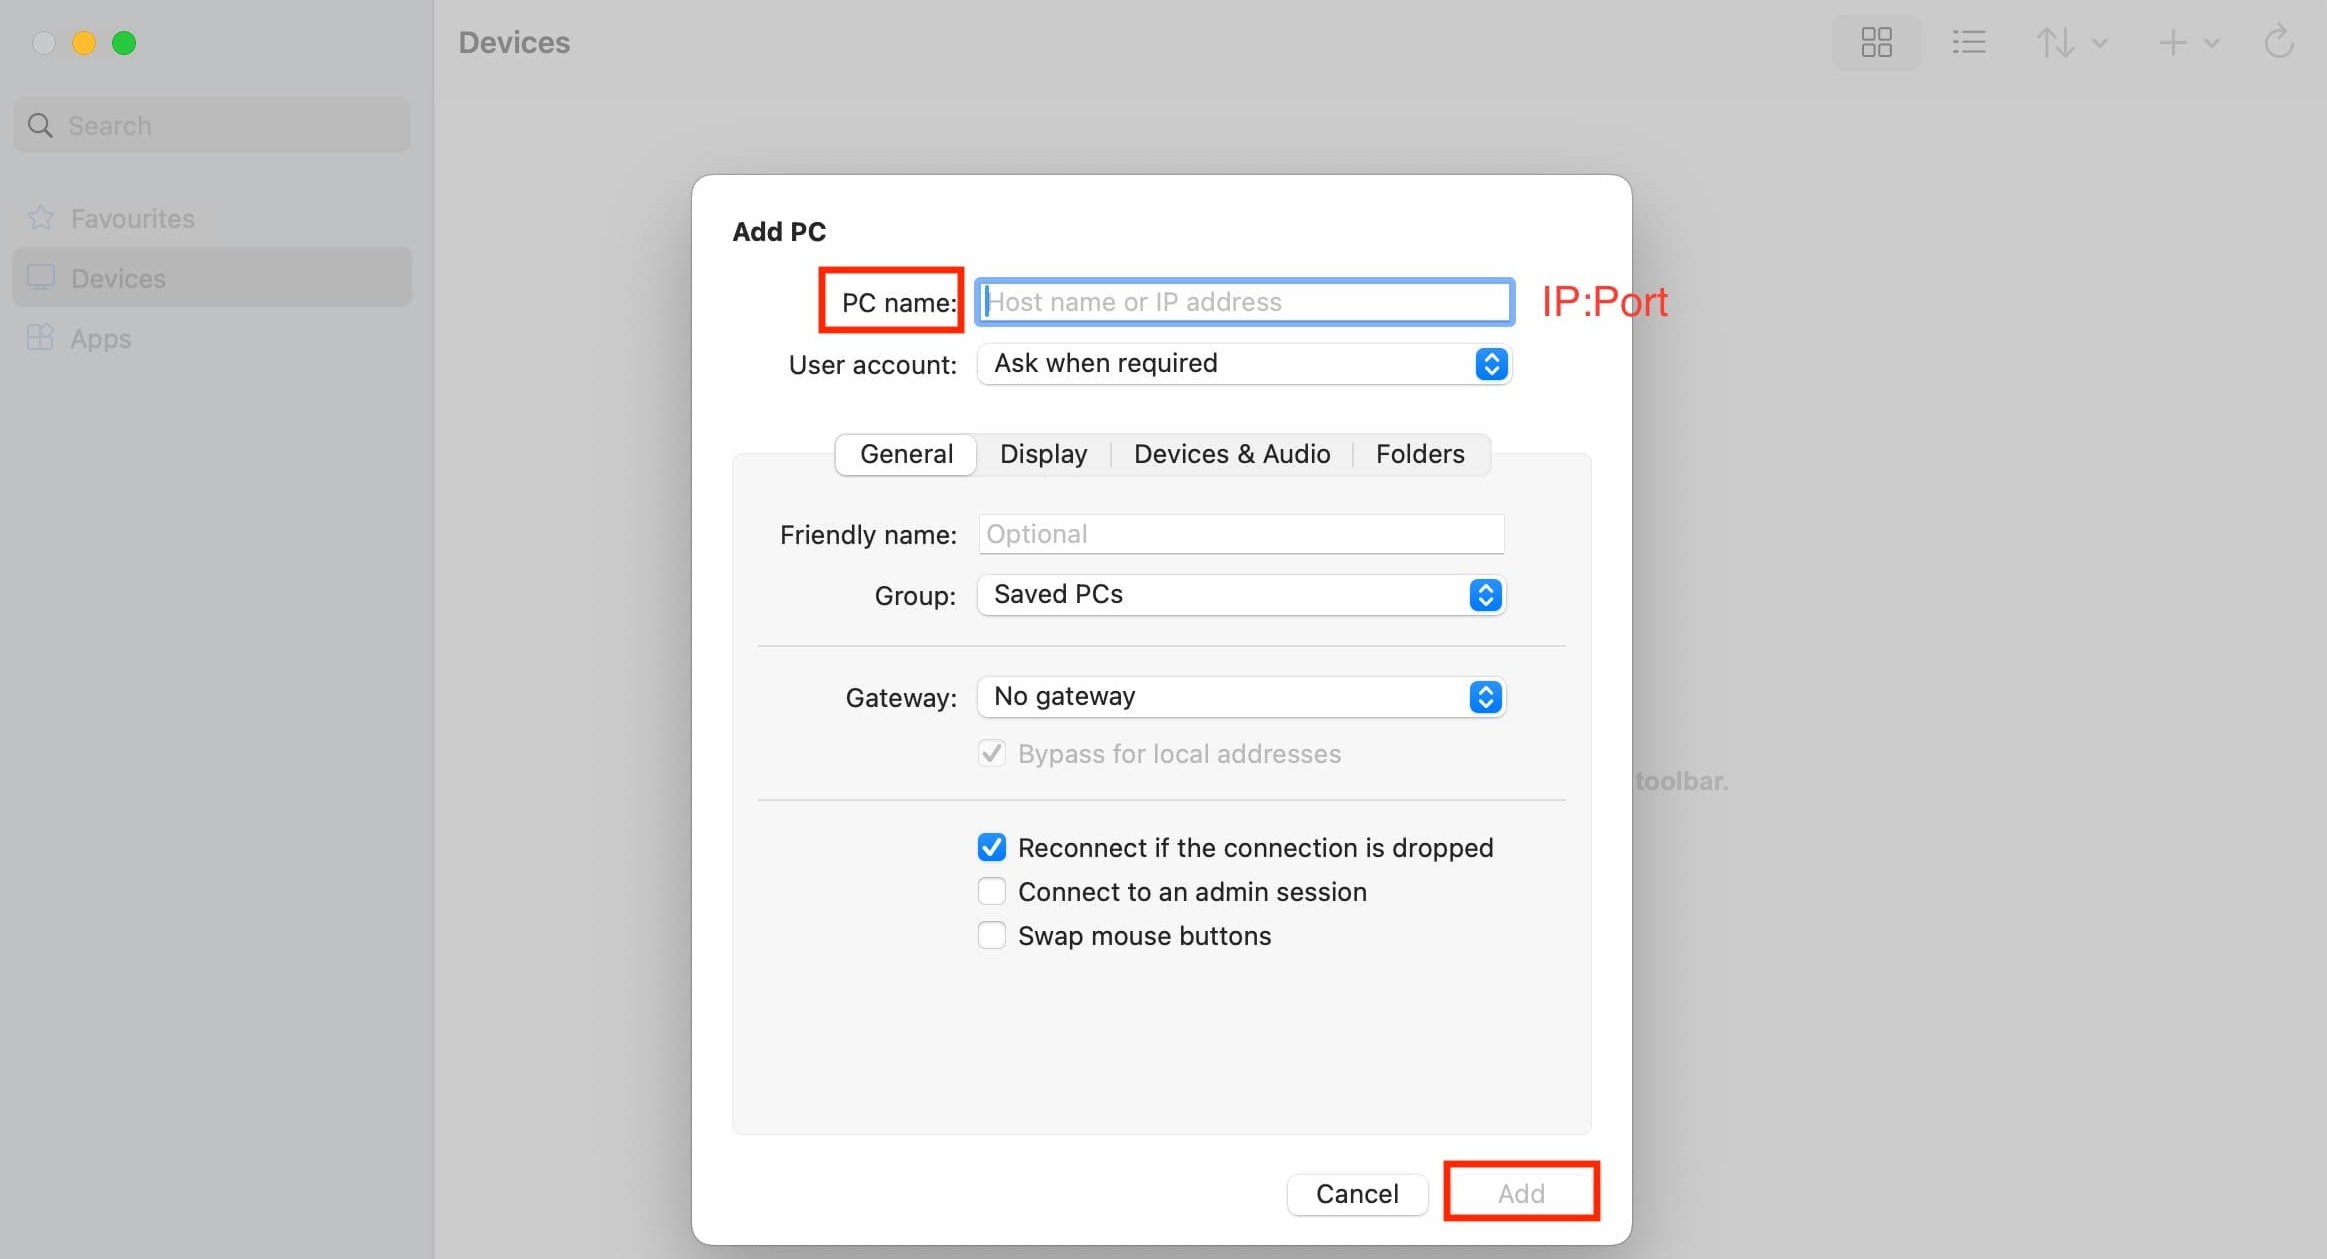
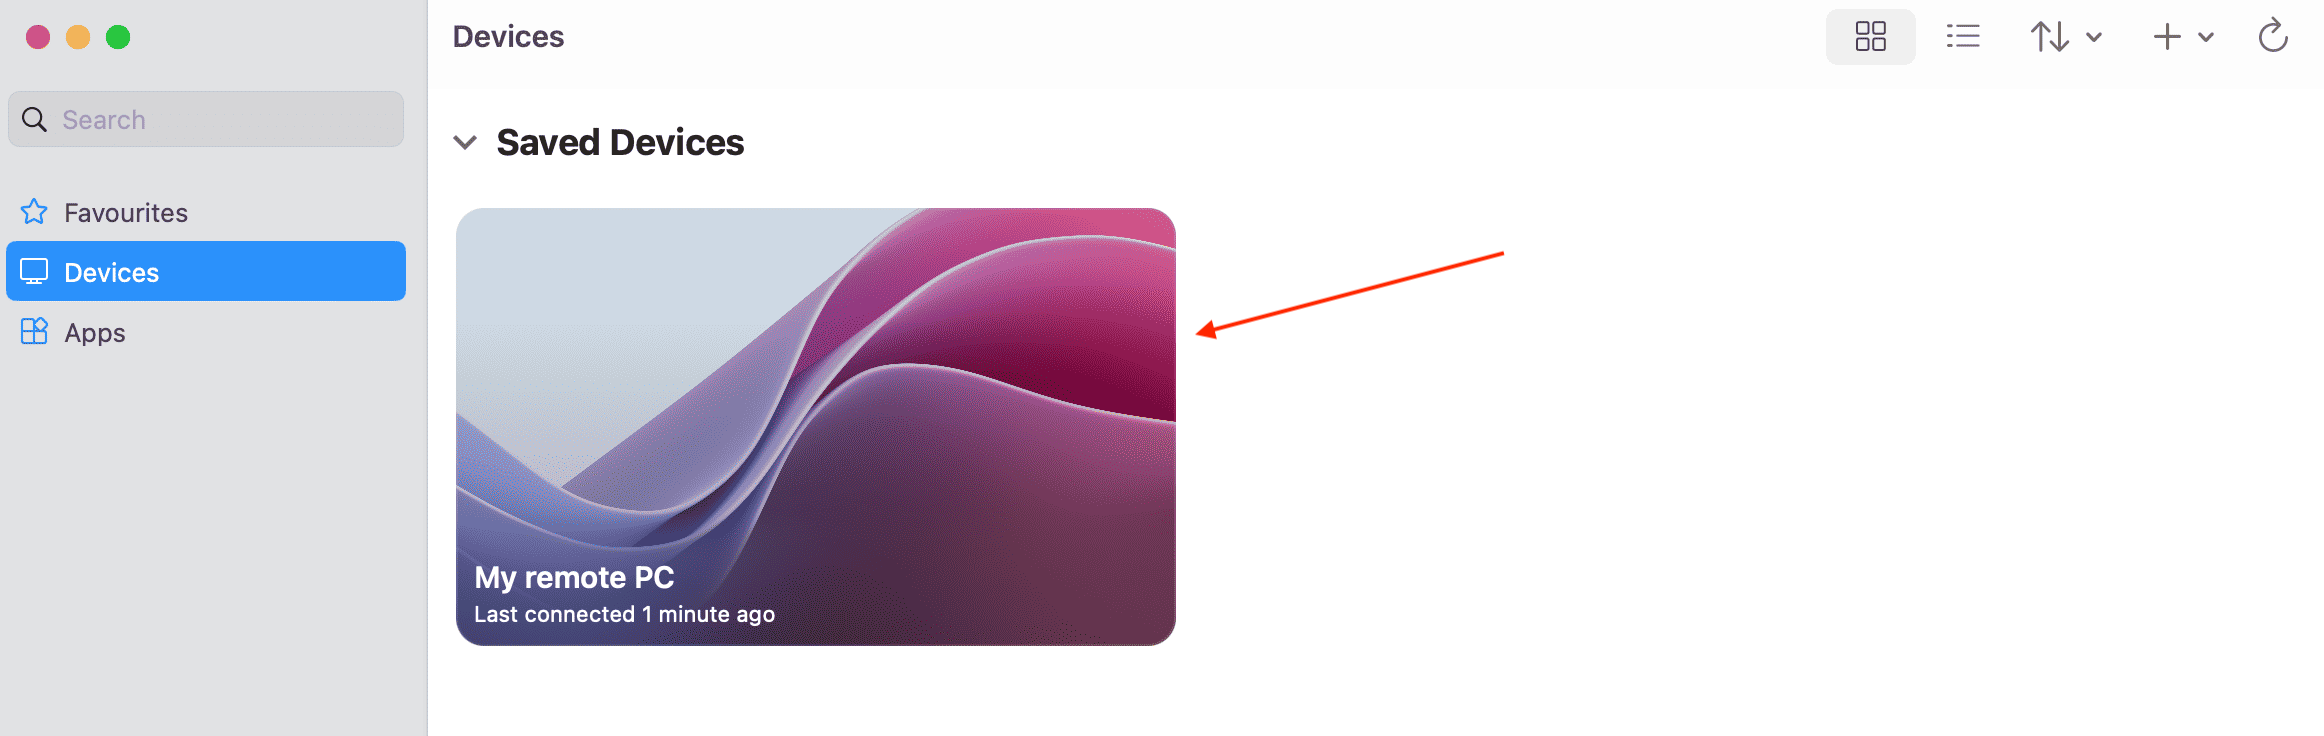
Step 4: Connect to Server
- Double-click the saved devices connection
- Enter the following login credentials:
- Username: administrator
- Password: Your server password
- Continue when prompted about certificates/security warnings
Step 5: Connected Successfully
You should now see the Ubuntu desktop environment. Your Ubuntu remote desktop setup is now complete on macOS.
Connect via SSH
SSH allows you to access the server terminal directly. The setup method depends on whether your server uses a shared IP or a dedicated IP
SSH Access for Dedicated IP Server
A dedicated IP Server is the easiest to set up for SSH because port 22 is already publicly accessible.
Step 1: Open Terminal
- Windows: Use PowerShell, or Windows Terminal
- macOS/Linux: Open Terminal
Step 2: Connect via SSH
Use this command:
ssh username@SERVER_IPStep 3: Accept Fingerprint
First-time SSH connections may show:
Are you sure you want to continue connecting?
Type yes and press Enter.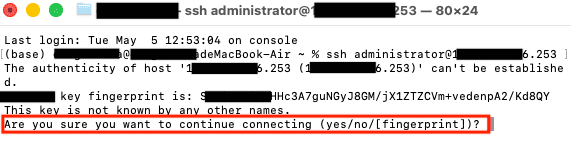
Step 4: Enter Password
Input your server password. You are now connected via SSH.
SSH Access for Shared IP Server
A shared IP server requires additional configuration before SSH can work. Because multiple server instances share the same public IP, port 22 is NOT exposed automatically.
You must configure Port Mapping first.
Step 1: Open Networking Settings
- Log in to the control panel
- Open Networking
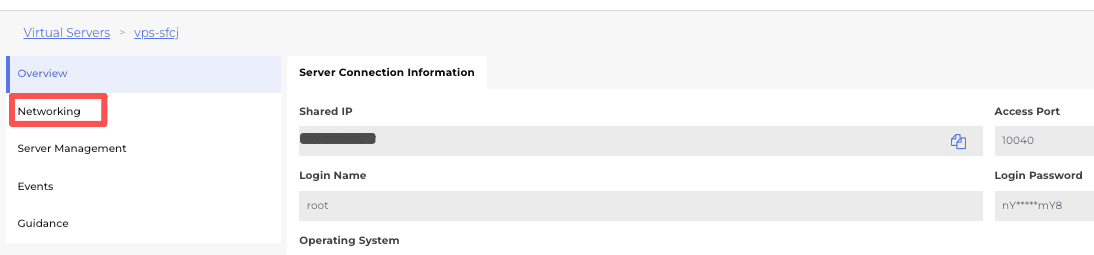
- Find Port Mapping

Step 2: Add Port Mapping Rule
Create a new rule and click Confirm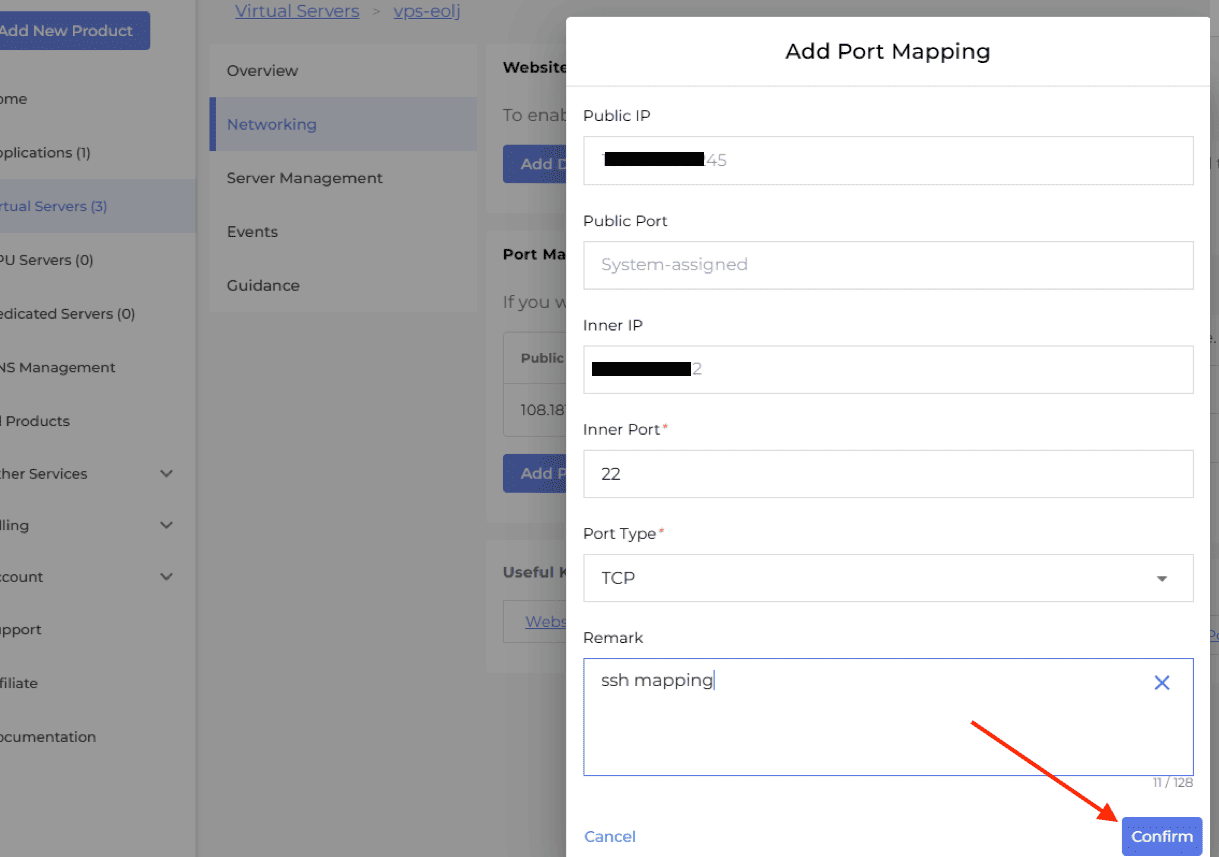
Step 3: Connect via SSH
After mapping is added, you can connect using:
ssh username@PUBLIC_IP -p MAPPED_PORTExample:
ssh root@203.0.113.10 -p 10022Summary
This article explains how to connect to a Linux Desktop server from start to finish. It covers the full connection process in order, including how to:
- Deploy your server after purchase
- Retrieve your server login details from the control panel
- Connect to your server using Remote Desktop (RDP) from a Windows computer
- Log into the Linux desktop (GUI) environment successfully
- Configure SSH access for shared IP Server using port mapping (required to expose port 22 to the public network)